This is a post months and years in the making.
So here are my tips and how to's about how I've developed my dying over the course of a couple of years. There are suprisingly many many factors to consider before trying this process and many tips that I've come up with to master this technique for the best looking dye possible.
So please enjoy!
Tools:
Scissors
12 inch paper cutter
9 by 13 inch glass pan
cookie sheets
oven
hole punch
Bath Towel
Materials:
Manila Folders
String
Instant Coffee
 Folders:
I began using Used manila folders from an office. The first couple hundred tags I made quickly knocked out that stack and so I was left to find the cheapest folders I could. I use this brand from Walmart. There are 50 folders in a box that costs $3.44
There are other options such as Target, but these folders usually always have a brand name printing in the inner folder, which is very aggravating having to cut around and there is more waste this way.
This though is only a problem because I do make so many. So other brands will still be a good value if you are only dying a small amount of tags.
 Cutting tool:
The first tool you will need is a paper cutter. This fantastic purple Fiskars 12 inch paper cutter. I bought from Michaels many years ago on my very last day working there. I was just starting my journey at becoming a stay at home mom and I had no idea that this $5 tool ($9.99 originally, I used a 50% off coupon) would be a huge staple in my at home business to come. The orange replaceable blades are inexspensive and last a long time. I would estimate 10,000 tags worth.
I would love to someday move onto a cutter with an arm, that will cut more folders at a time. Thus cutting down on my production time. But, with my 3 little ones around, I opt to keep my cutting tool as safe as possible.
 Folder Prep:
There are two ways that I often cut the folders before dying. Sometimes I will cut the tabs of each folder and cut along the fold in the folder so that I'm left with what looks like two sheets of card stock. This allows me to have coffee dyed sheets of paper that will allow me to cut the tags the size as needed as they are ordered in my shop.
Other times I cut the folders to tag size, hole punch and string before dying.
My standard tag size is 1.5 by 3 inches. I alos have Mini (1.5 by 2 inches) and a large size ( 2 by 4 inches)
When deciding which option you will choose, also consider that the cotton string ties will get coffee dyed along with the tags.

Workspace:You will only need a small amount of counterspace when doing this project. A place for the pan you are dipping the folders into, a drying spot and a spot for storing the sheets or tags that have been dried. I do recommend cleaning the counters so that no liquid or food items can be transferred onto the folders.
Kind of Coffee:
The best coffee to use for my purposes is an off brand instant coffee jar. I get the largest because of the amount of dying I do. If you accidentally use a coffee that is not labeled as (instant) you can still dye the tags, you will just be inconvienced with coffee specks on the paper and when they are all dryed there will be many of these specks to wipe off the paper. Thus making the process incredibly more messy but still with a suitable outcome.

Mixture and Soaking:
If you are soaking sheets of folders, you will want to use a 9 by 13 inch glass pan. If you are dying tags cut down smaller, you can oviously use a mixing bowl or something similar.
I use about 4 tbsp or more of coffee and fill the water about 2.5 inches in the pan.
The more coffee you use is one factor in how dark the tags will be. (The second factor being the length of time the tags sit in the coffee and the third factor being how long the tags are in the oven being dried)
Individual sheets need to be dunked under the coffee mixture one at a time. I do this by setting one sheet into the mixture and pressing down with a spatula. It is best to have a small plate near by to rest the spatula on, so that your counters do not get dyed with coffee.
This step will assure that the sheets don't stick together, allowing coffee to fully coat each side of folder.
When dying tags already cut and strung, they can be thrown in all together.
When dying sheets, I put in about 30 sheets at a time. When dying tags already cut and strug I thow in howeve many will fit.
Soaking time if based on your desired look. For 5 minutes or less of soak time your end result will only be a slight bit darker than the creamy color the folders are originally.
The best soak time will be about 10-12 minutes.
 Ringing out:
Make sure your towel is folded in half so that half of your towel is setting on the counter and half is ready to be folded over the wet tags.
The paper will be wilted and thin. When ringing out a pile of tags already cut and strung, you risk accintally pulling out the strings because of how fragile the paper becomes after sitting in the water.
To ring out the water from sheets you will want to grab all of the sheets you've put into the pan and hold over the pan. This will allow for signifigant amount to drain off the paper. Then squeeze around the sided of the papers , turing the whole pile and ringing until you've gotten out as much liquid as you can.
Then set on the towel resting on the counter. The free half of the towel can then be folded over the sheets and pressed on top of them, getting as much moisture out as possible before putting into the oven for the drying process.


The first time I did this project I spread each individual tag out onto many bath towels on my counters and kitchen floors. I left them to dry overnight. This is a very nice way to dry the tags however here are some factors to consider before deciding if you will dry them this organic way or in the oven.
When drying on towels overnight:
*It takes quite a bit of time laying out each tag so that they can dry properly
*It takes alot of room depending on the amoung of tags your dying
*If you have children, this project will need to be done after they go to sleep so that they do not *Pick up a towel full of tags and drag them across the house :)
*You run the risk of the tags getting mold spots if they are too wet
*Because of the mold risk, full sheets of paper really shouldn't be dried like this because sheets hold in so much more moisture
When drying in the oven:
*It will take a signifigantly shorter amount of time to dry out the tags or sheets
*Depending on how often this done you may want to consider energy cost in running the oven.
*Even at the low temperature the oven will be on at, if you are dying many tags. you will want to run the oven in the evenings during the summer and daytime during the winter.
*You must watch vidulantly over the tags for their duration in the oven (especially if kids are around)
In the first few months of making my tags I decided for me personally, the best way would be to use the oven to dry the tags. This cuts down signifigantly on production time.
 Spread already cut and strung tags onto the cookie sheet. Consider that any overlapping tags will be stained in an uneven manner.
Sheets can be laid out 3-4 on a sheet. Usually about 2 will cover the length of the sheet and you can only have one layer of folders or the underneath 2 folders will not dry.
I keep the tags in the oven at 290 degrees for about 10-12 minutes.
Once this time is up. I pull them out and slide them off the pan onto the counters to cool of a bit.
about 5 minutes later I move into a basket to be taken to my stamping station.
 I hope you will have much success with this technique and
Please feel free to contact me anytime at my E-mail address YourAngil@Hotmail.com for questions concering this tutorial :)
Here are just a few of the many ways coffee dyed tags can be decorated....

Simply Stamped ( I would only recommend Staz On ink Pads) all others will smudged.
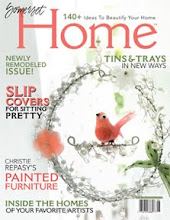
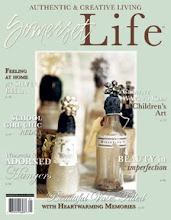
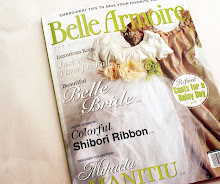
 (These tags as seen in Artful Blogging)
 Made into earring Cards (these measure 3 by 5 inches)
(These Earring cards were featured in Belle Armoire)

Glue or sew on Ephemera pieces and fabric and lace strips
 Quilt tops cut into hearts and other small fabric pieces sewn onto the tag
 (These particular tags were featured in Art Quilting Studio Magazine.)
 Stamped and adorned with rhinestones.